How to Make a Scary Shark Container From Polymer ClayM
M
In 30 Cool Hand Drawn Steps
playful parenting
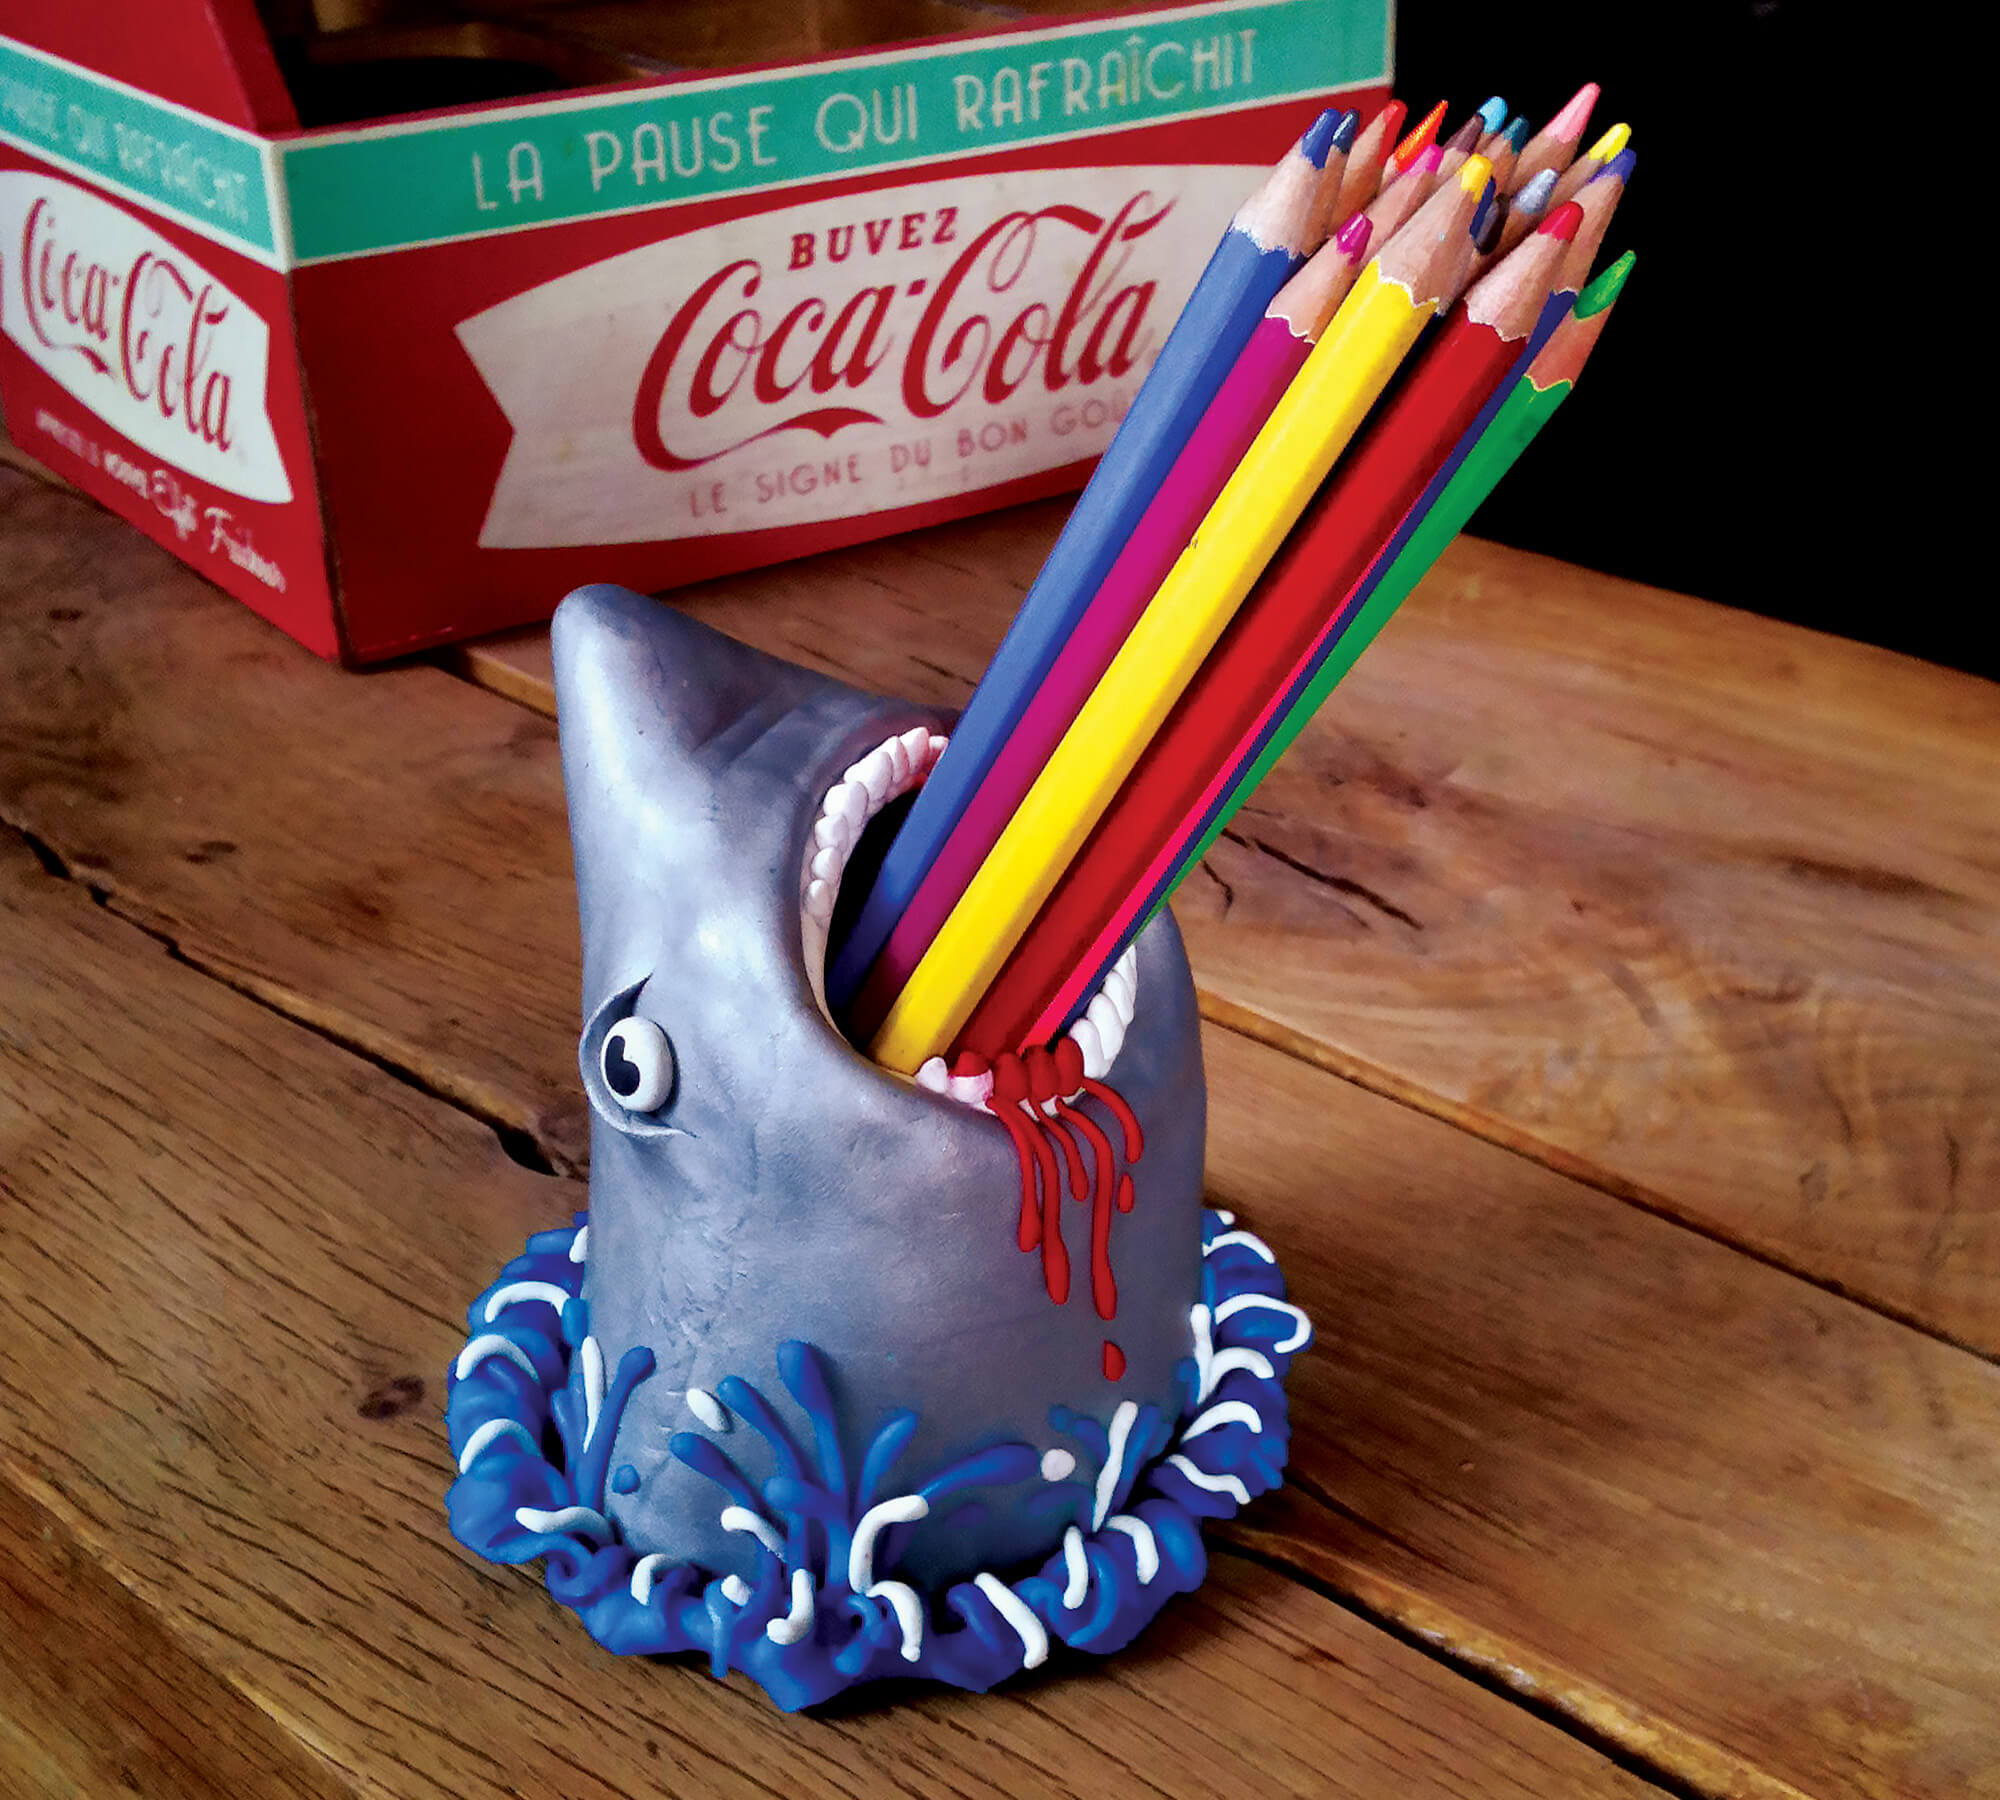


FIMO is not just great for creating dainty jewellery, you can also go large, like this scary shark mouth container!
Definitions first: FIMO is a popular polymer modelling clay, but their are other brands. It’s a cool material - once you’ve made your model you just harden it in the oven, no need to wait for it to dry!
Step by Step Guide
Let’s begin moulding…

Step 1: First, create a simple wire frame to support the shark. Follow the measurements shown, it doesn’t have to be very accurate.

FIMO can be hard to work with, especially on a cold day, so here’s two tips:
FIG 2: First warm the FIMO in your hand, gently squeezing it until it becomes ‘soft’ and more malleable.
FIG 3: Secondly, when joining two pieces of FIMO rub backwards and forwards over the seam, the friction will help create a nice join.

Step 4: Use a roller to flatten two blocks of silver FIMO into square sheets.
Step 5: Take one sheet and join the corners to form the shark ’nose’.
Step 6: Position the nose over the wire frame.
Step 7: Wrap and mould the FIMO around the wire, this will form the top part of the shark’s mouth.

Step 8: Take the other sheet of silver FIMO and join it onto the first sheet.
Step 9: Do this by overlapping the FIMO and cutting the excess away with a knife.
Step 10: Rub your finger over the join to smooth it out.
Step 11: Fold the FIMO over the wire and finish moulding the mouth.
Step 12: The side view should look like illustration.

Step 12: Flatten some light blue FIMO and create a rough circle shape.
Step 13: Place the sharks head on top.
Step 14 & 15: Push the blue FIMO upwards to create wave like folds around the base of the shark.

Step 16: Roll a white ball of FIMO and then flatten it.
Step 17: Now flatten a smaller black ball of FIMO and use a knife to cut-out a small ‘v’ shaped slice.
Step 18: Attach it to the centre of the flattened white ball.

Step 19: Mould silver FIMO into a curved arc with a triangular cross-section.
Step 20 & 21: Join it onto the sharks head and add the eyes - use illustration (21) to help positon them correctly.

Step 22: Make two tapered sausages of white FIMO by gently rolling them on a flat surface with your fingers.
Step 23: These are the gums, join them onto the inside of the shark’s mouth.

Step 24: Make lots of pointy shark teeth from small pieces of white FIMO.
Step 25: Use a nail to make a series of holes along the gums.
Step 26: Push a tooth into each hole - bigger teeth in the centre and smaller teeth towards the corner of the mouth.
Step 27: Add a touch of blood with some red FIMO.

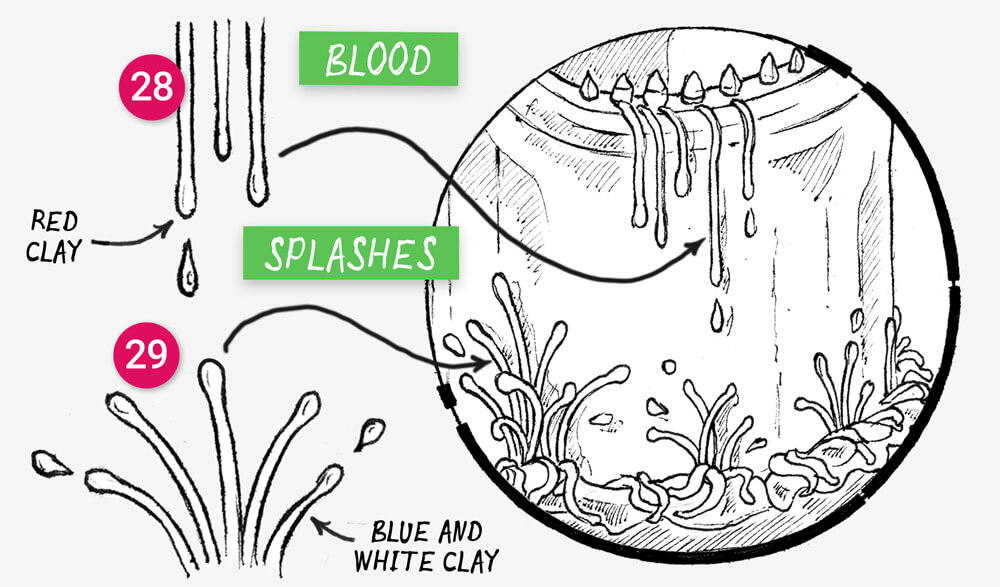
Step 28 & 29: Add blood drips and water splashes to complete the shark. Both are made from thin worms of FIMO, but with slightly bulbous ends - just follow the illustration above for guidance on how to position them.

Step 30: For a gory finale, make a half eaten fish and delicately balance it over the Shark’s lower set of teeth!
Materials List
- 2 blocks of silver FIMO
- 1 block of red, white, black FIMO
- 1 block of light blue and dark blue FIMO
- Wire (1.5mm)
- Pliers
- Pastry roller
Creative Takeaway
FIMO can be used to create larger functional objects as well as decorative objects such as jewellery and keyrings.