How to Make Spooky Knife Block Cutouts for HalloweenM
M
In 10 Cool Hand Drawn Steps
home hacks


Give your kitchen a wonderfully ghoulish vibe, with these spooky Halloween knife block cutouts!
You can make them from scratch, or use my printable artwork… making them the perfect last minute Halloween decor idea!
Step by Step Guide
This is a great project for the kids… well, the drawing part, Mommy or Daddy will need to handle the knives!
And if drawing is not for you, download the printable artwork by signing up below…
BOO! Let’s get going…

Please note: It’s important to get the position and size of your spooky character’s body right, so we’ll make a rough stencil from thin paper first.
Step 1: Begin by glueing two sheets of A4 paper together.
Step 2: Lean it against the knife-block and crease around the ends of the block.

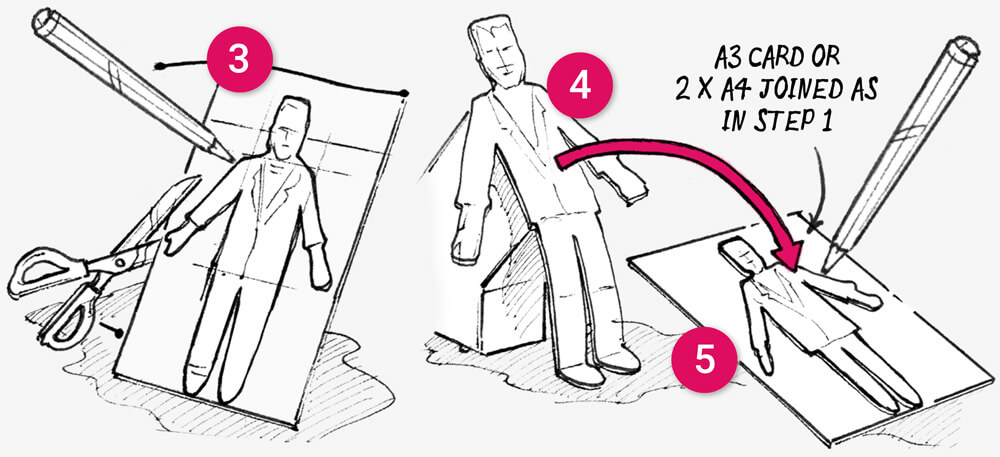
Step 3: Within the creases loosely sketch the body of your character, then add the arms, legs and head.
Step 4: Cut the character out and hold it against the knife block… check it’s the right size.
Step 5: Now, place the cut out character onto white card (210gsm)… either an A3 sheet, or two sheets of A4 joined together. Trace around the edge with a pencil, and then spend some time drawing your character for real.

Step 6: Cut carefully around your character using a craft knife or scissors.
Step 7: To finish off, position the cut-out against the knife-block and push the knifes through the card and into the knife slots.

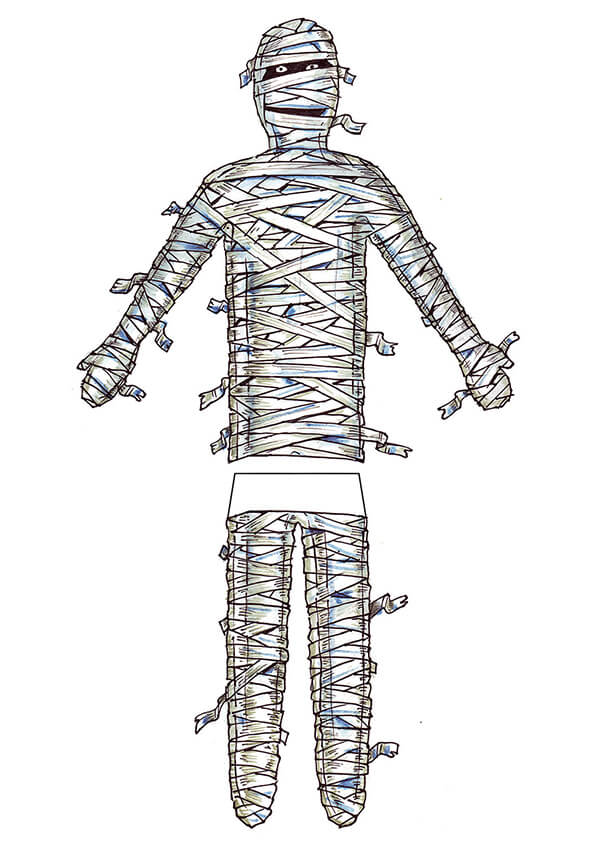
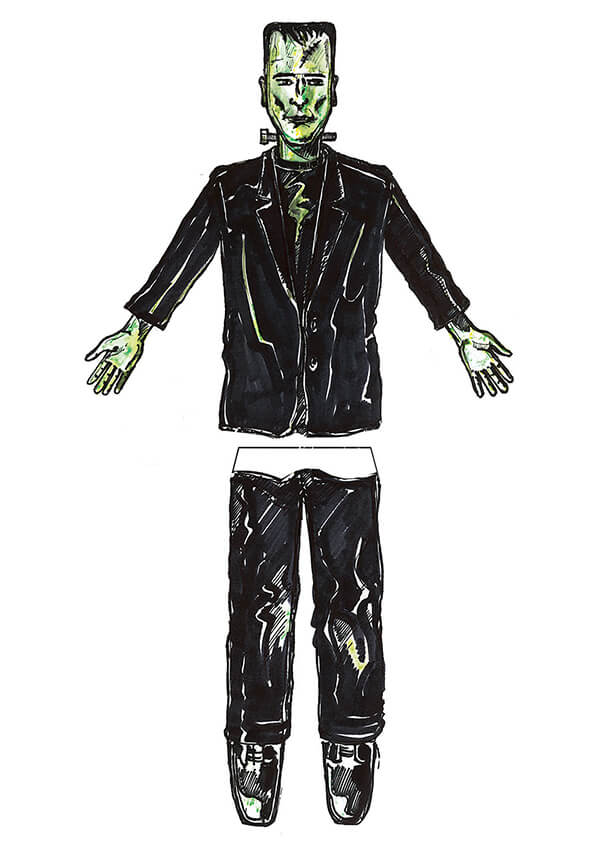
Step 8: Print out my artwork onto two sheets of A4 card, paper will also work but won’t be as nice.
Step 9: Cut out the artwork using a craft knife.
Step 10: Glue the legs onto the body. Repeat Step 7 and you’re all done!
Materials List
- Two sheets of A4 paper
- A3 white card (or 2 x A4 card)
- Colouring pens or crayons
- Scissors or a craft knife
- Paper glue (or sticky tape)
- A knife block!
Creative Takeaway
Paper isn’t just about what you draw on it… sometimes, it’s all about where you put it!. Maybe there’s other things around the house you can transform by simply attaching a paper creation… have a think?
