How to Make Yukky Bugs From Pencils and PaperclipsM
M
In 20 Cool Hand Drawn Steps
playful parenting
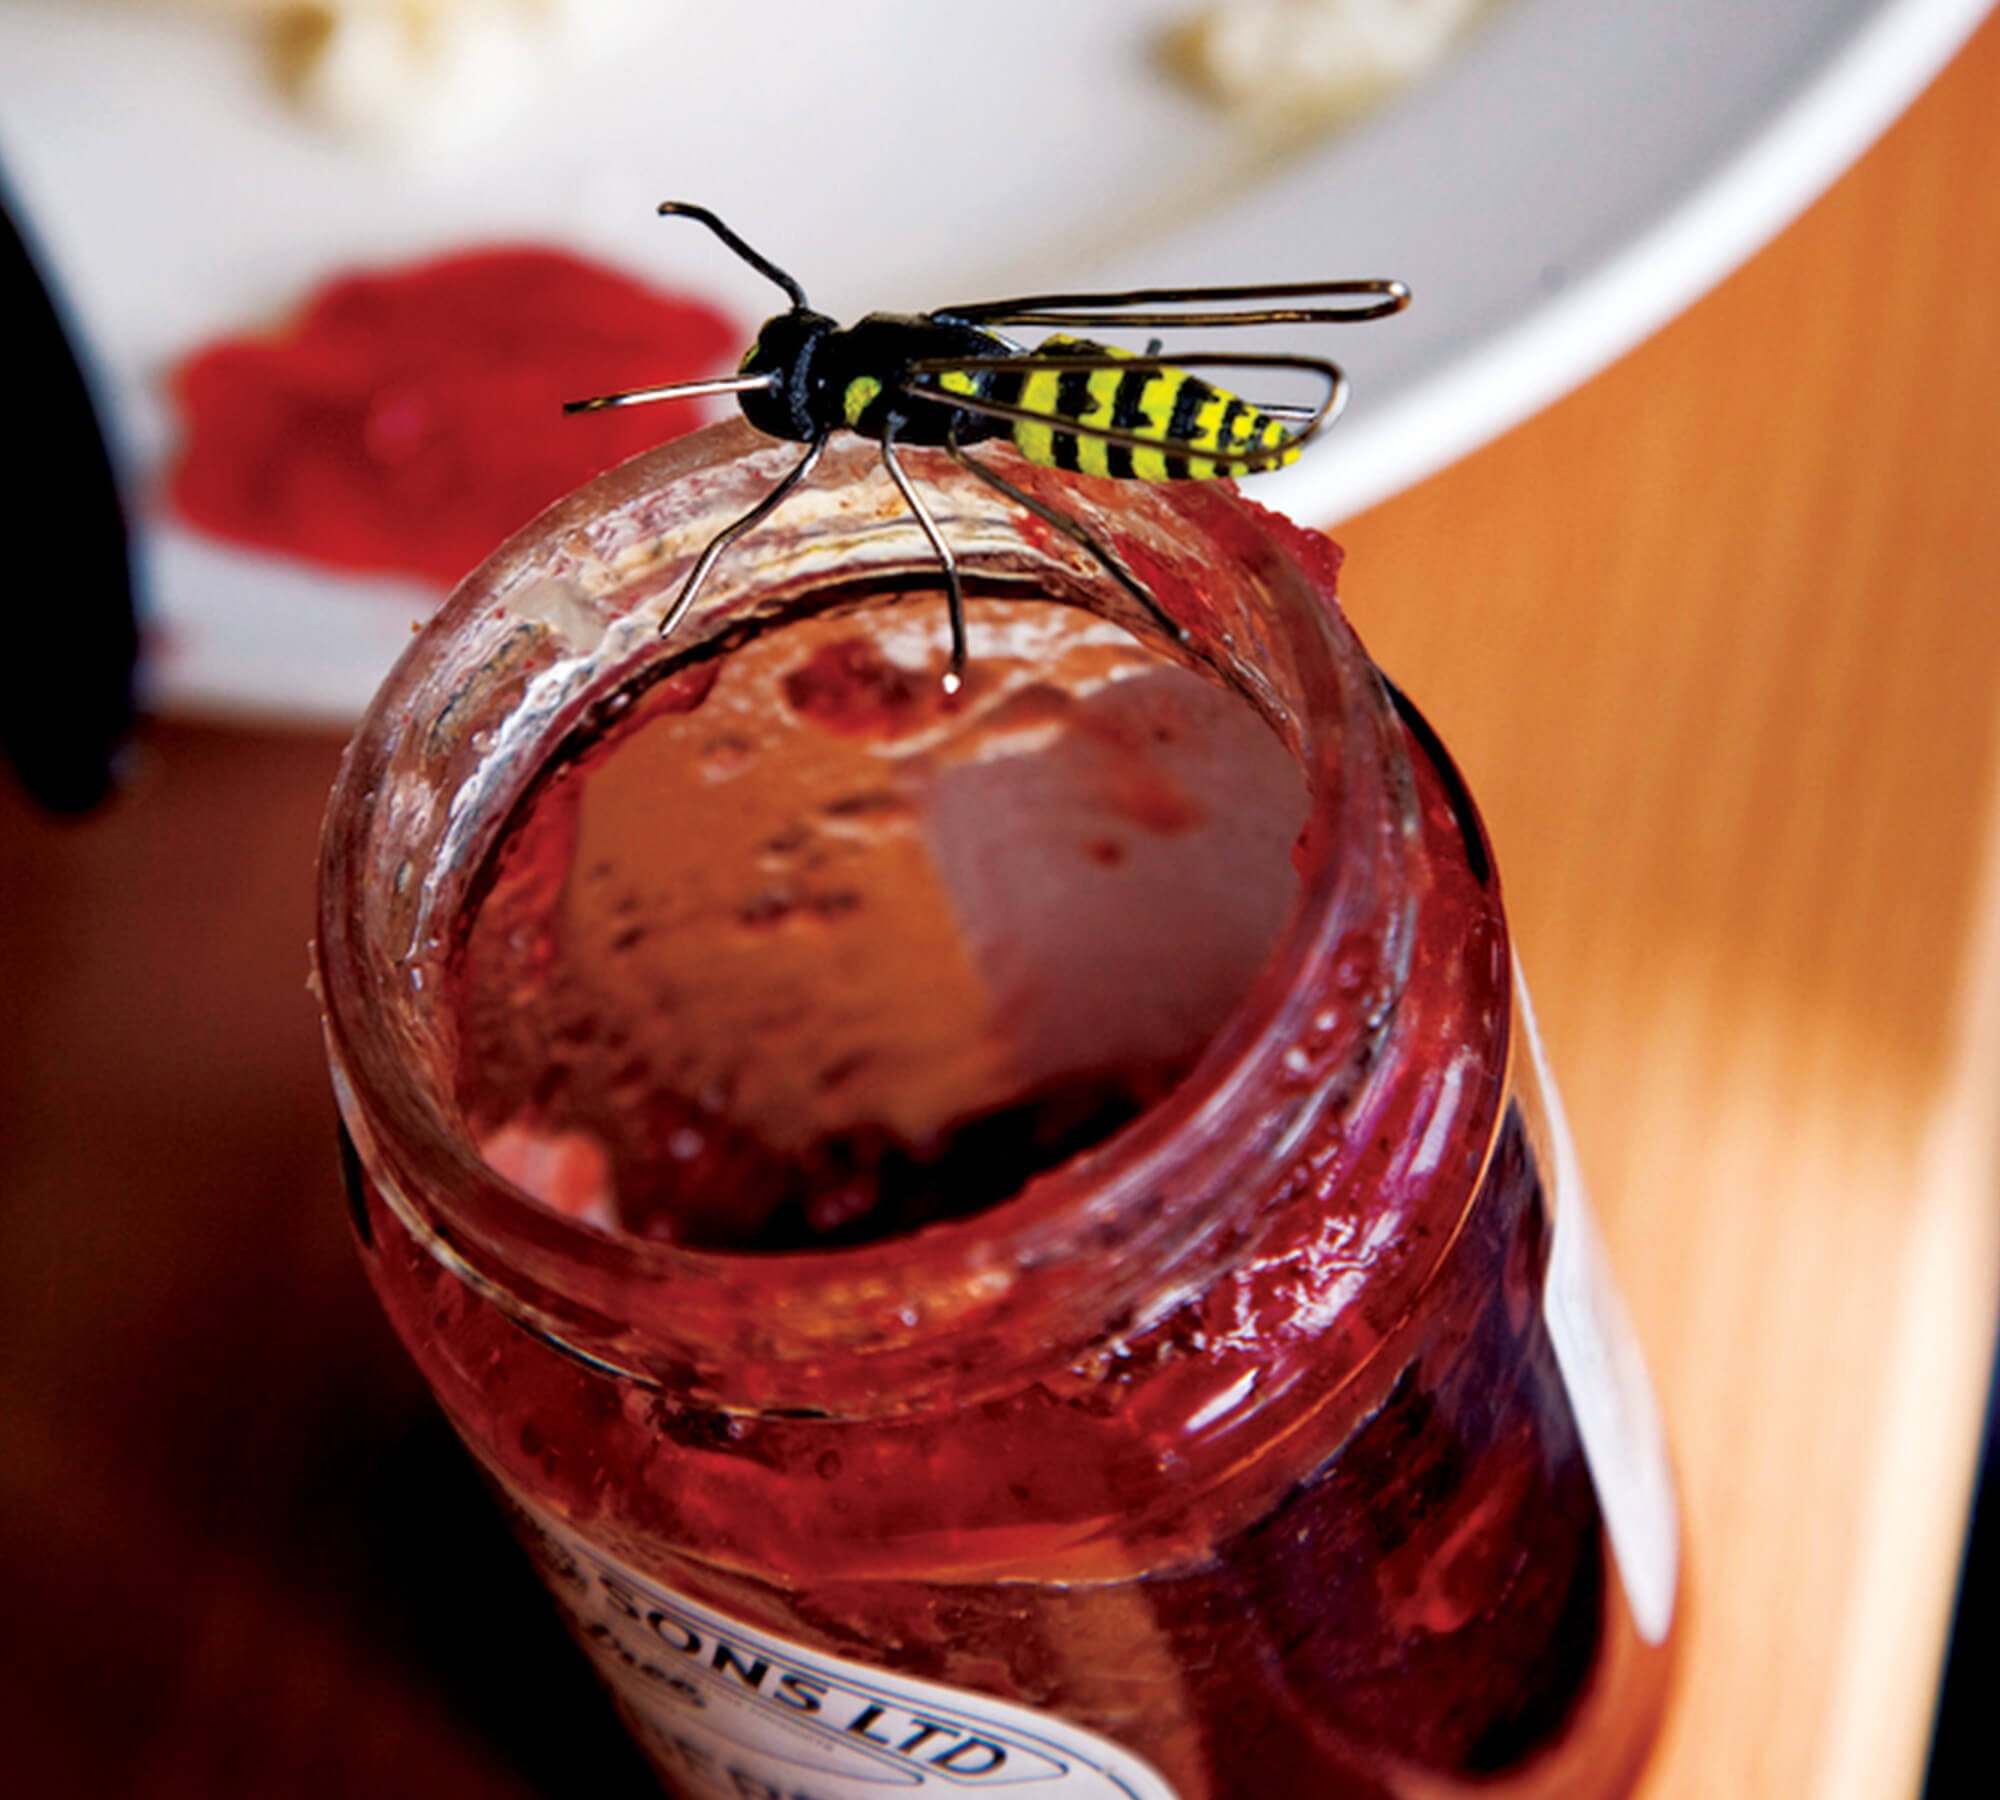


These yukky bugs will definitely get a reaction… there’s nothing better than a wasp in the jam, or a fly in the butter to provoke a response!
What’s more, they are only made from old pencils and paperclips!
Step by Step Guide
Here’s how to make your own bugs from pencils and paperclips… the first half covers techniques and the second half provides detailed plans for each bug.

Step 1: Collect all your old pencils, but only the ones with a circular cross section, not hexagonal.
Step 2: Use sand paper to remove the painted surface, if it has one.

Step 3: Consult the ‘bug plans’ below for measurements and then mark the segment length using a ruler and pencil.
STEPS 4 & 5: Use a combination of sand paper and a pencil sharpener to shape the ends, which will either be ‘rounded’ or a ‘pointy’.

Step 6: Use a hacksaw (or hacksaw blade) to cut off the segment.
Step 7: Take the segment and gently round the cut end with sand paper.

Please note: There’s two types of holes, one through the centre (for joining them together) and the other into the sides (for adding wings and legs). Also, although its possible to join the segments using a straightened paperclip I preferred to use thicker wire, around 1.5mm.
Step 8: For drilling through the center, choose an appropriate size drillbit for the wire you have chosen, and remember not to drill all the way through the end segments!
Step 9: For drilling the side holes, use a drill bit slightly larger than the diameter of the paper clip wire, there needs to be some room for the glue.

Step 10: Pliers are the best tool for bending the wire accurately. Use the ‘bug guides’ below to get an idea of shape and size.
Step 11: As mentioned in Step 8, I found it easier to use thicker wire to connect the segments, but if you don’t have any try using two paperclips.

STEPS 12 & 13: You need a hard setting glue to assemble your bugs. I used an epoxy based glue called Araldite, it consists of two separate compounds that have to be squeezed out in equal measure and then mixed thoroughly.
Step 14: Before it sets, take another paper clip, and use it to dab some glue into the side holes.
Step 15: Push the leg, wing or feeler into the hole.
Step 16: Remove any excess glue using another paper, clip before the glue sets.

Step 17: For joining segments dab a blob of glue onto the connecting wire.
Step 18: Gently push the segments together (18).
Step 19: To get a nice even shaped join, push the segments slightly beyond their final position, and then pull them apart again.
Step 20: It’s likely some of your centre holes will be off centre. Try rotating the segments (before glueing) until you find the combination that looks best.

Step 21: Paint the bugs using acrylic paints and a small brush, use the photographs above for colour references.
Detailed Plans

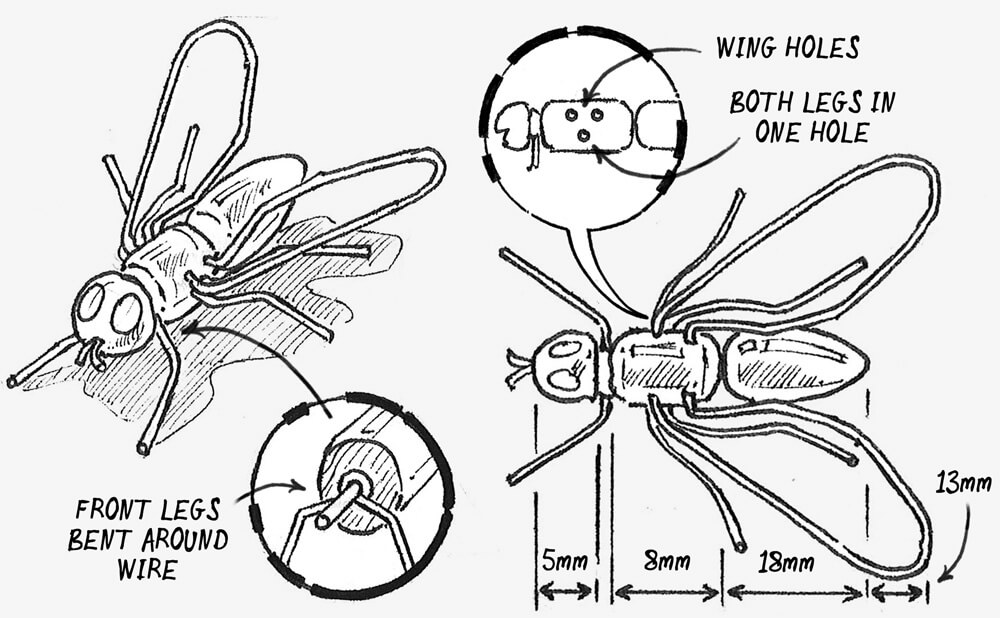
Please note, BOTH back legs fit into a single side hole, so you may need to enlarge the hole by wiggling the drill or using a larger drill bit.
Also, the front legs wrap around the centre wire, so you’ll need to add this before glueing the segments together.

Curve the central wire into the shape above. Add legs between segments (but not every segment) and use glue to create ‘spacers’ between segments.

Similar to the caterpillar, but more segments and no legs.
Note: Don’t put too much glue between each segment, they need to be close together, this is a worm not a caterpillar!

The wasp is similar to the fly, just add ‘feelers’ and watch out for the different wing and body shapes.
Also, the wings fit into a single hole and the legs fit into two holes.
Materials List
- Old pencils and paperclips
- Sand paper
- Pencil sharpener
- Epoxy glue
- Drill and drillbits
- Pliers and wire cutters
- Acrylic paints and paintbrush
Creative Takeaway
This is another good reminder that anything made from wood, even the humble pencil, can be creatively repurposed… never throw wood things away!