How to Turn Sticks and Wire Into a Signature Fruit BowlM
M
In 17 Cool Hand Drawn Steps
uber upcycling


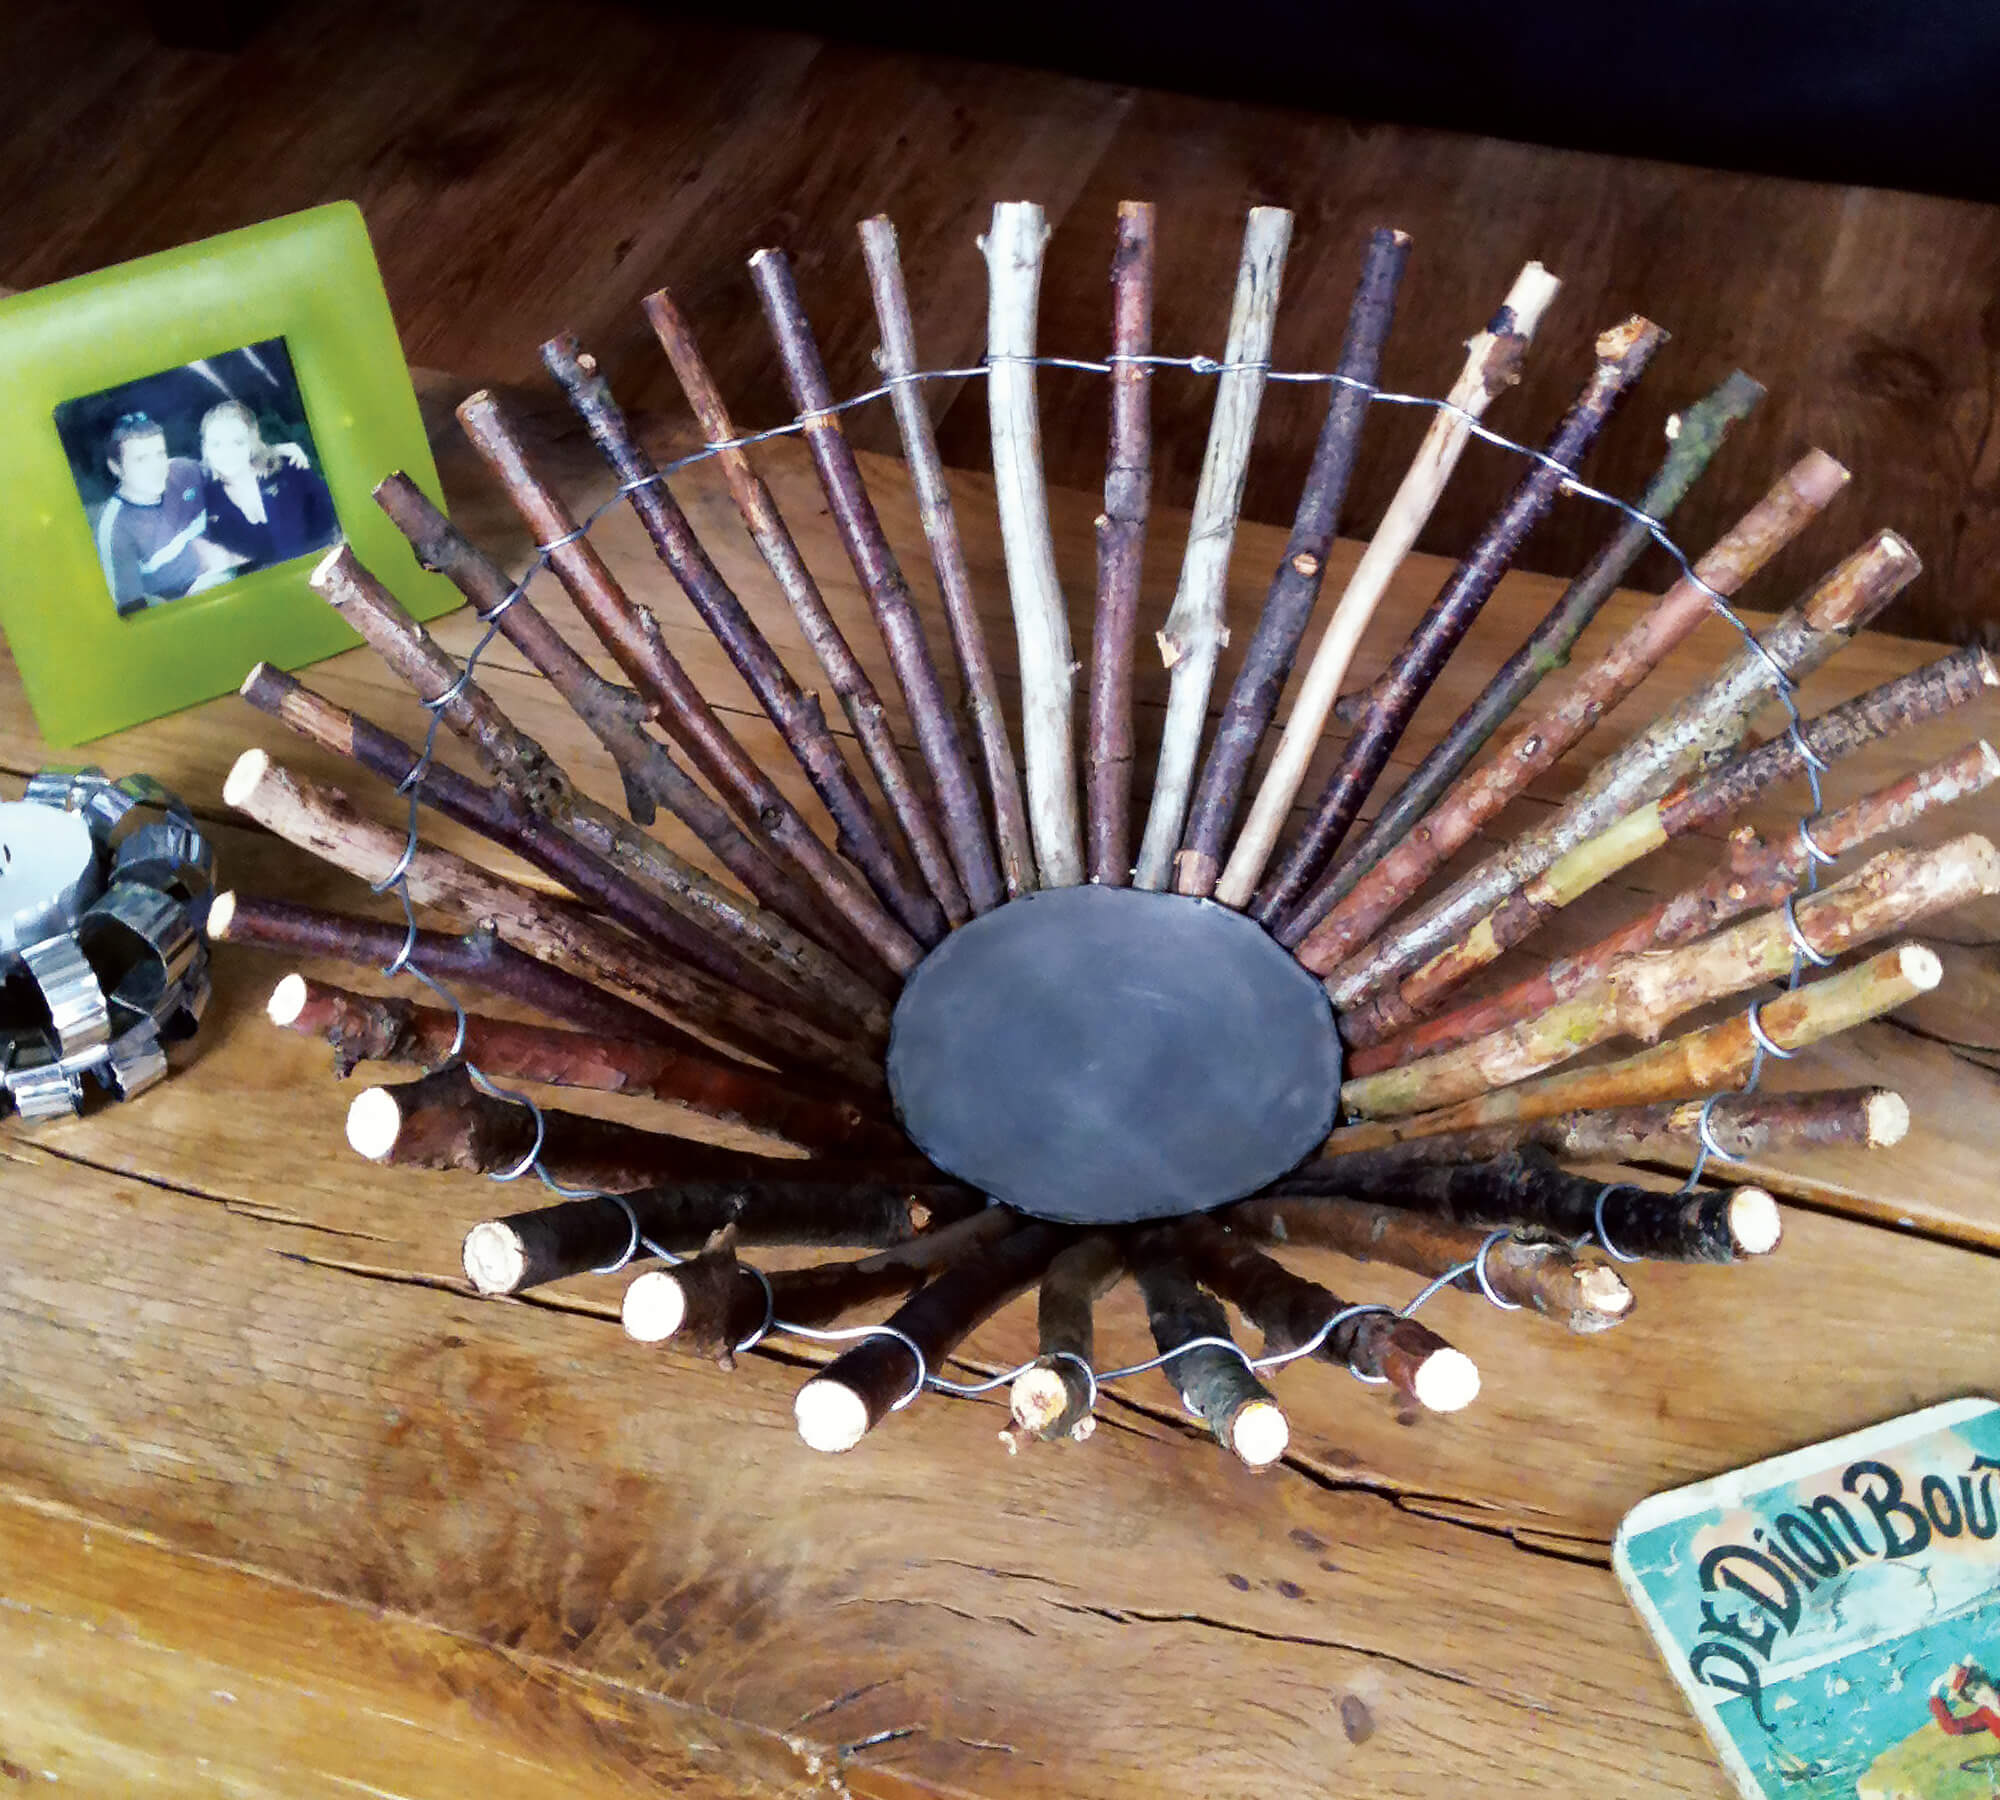
The rustic bowl every table was made for… provided free courtesy of Mother Nature!
That’s right, it’s never been easier to make something so eye-catching, from a material so readily avaialble… just collect some sticks when you next go for a walk and follow the foolproof technique below.
Step by Step Guide
To make your own rustic bowl from sticks and twigs, just follow the easy instructions below. Time to get going…

Step 1: The first thing you need to do is take a walk in the woods and forage for small branches that have fallen from trees.

Step 2: Choose branches that have a straightish section and are around 8mm thick… about the same thickness as the handle of a large wooden spoon. Collect at least 40 sticks, but more would be better, as you might have to discard some later.

Step 3: Cut a 170mm section from the straightest part of the branch (A). Roll the stick so the LEAST straight side is facing upwards (B) and then drill a hole (2mm in diameter) 8mm (C) and 38mm (D) from each end of the stick.

Step 4: The next step is to join the sticks with wire, one by one, as you can see above. The following steps will show you how.

Step 5: First, feed 1.5mm thick wire (at least 900mm long) through the hole that’s 38mm from the end of a stick (A). Wrap the wire all the way around, almost back to the exit hole, before curving it outward slightly (B).

Step 6: Slide the next stick onto the wire (A) and butt it against a precut 13mm spacer (B). Wrap the wire aound the stick (C) just like the previous step (D). Repeat this step until all 40 sticks have been joined together.

Step 7: Join the two ends of the wire by twisting them together using pliers (A). Step 8: Trim excess wire with cutters, and bend the join over (B).

Step 9: Feed a length of wire through the other hole in the sticks. Squeeze the sticks together so the ends touch (A). Twist, trim and join the wire ends (B).

Step 10: Take an old biscuit tin (or something similar) and cut out a large flat section using tin snips (A). Place the stick bowl (narrow end down) on the section and trace around the inside using a marker pen (B).
Step 11: Draw 8 tabs (15mm x 15mm ) around the circle, equally spaced, using the marker pen. You don’t need to be too accurate!

Step 12: Cut around the tabs and circle using tin snips.
Step 13: Bend back the tabs, and then bend them forward, putting a fold about 1/3 of the way up the tab. Don’t fuss too much, as you’ll adjust the tabs in the next step.

Step 14: Push the base into the bowl, with the tabs facing downwards.
Step 15: Turn the bowl over, and adjust the tabs so each one rests on the end of a stick.

Step 16: Drill a small pilot hole into each tab.
Step 17: Hammer in a small panel pin.
That’s your centrepiece bowl finished, fill it with fruit and proudly put it in the centre of your table!
Materials List
- Branches/sticks/twigs
- 1.5mm wire
- iscuit tin (or somehting similar)
- Wire cutters or pliers with a cutter
- Drill and small drillbit (1.5mm)
- Hammer and panel pins
Creative Takeaway
When it comes to planning your next project, try looking around you, there could be unusual materials right under your nose.
If so, try making something fun from them, it will exercise your imagination and save you a trip to the shops!